Thursday, January 22, 2009

36) Coolant manifold

Photo

The coolant manifold got the same treatment as the intake manifold. You can also see here the outlet (top right) has been cut and re-welded to be shorter and now fits when bolted down in it's new flipped position.

You can also see on the bottom left a fitting for one of the heater connections. I ended up removing the steel tube that was originally bolted to the manifold, and tapped the hole for the NPT fitting.

Photo

You can see here how it fits under the intake manifold. The heater hose will go in between the intake runners.

Photo

Here's a quick show of how it all looks bolted up : )

Labels: , ,

Wednesday, April 2, 2008

29) It fits!

Photo

Here is the Subaru EJ22 all bolted up and the body temporarily back down on the chassis. This thing fits in there without any modifications to the body. (Note: I will need to modify the rear apron a bit for it to fit around the timing belt cover) I bolted the engine in with a Kennedy (KEP) adapter plate.

I can see now that there are a couple of items to address here. First of all the throttle body is pointed right at the firewall. I will rotate the entire intake assembly around 180 degrees. Secondly the coolant manifold is pointed strait towards the back of the car. I will flip that around 180 degrees. This will have to be cut and re-welded to clear the crank case (Pictures to come).

Labels: , , ,

Monday, January 28, 2008

25) Heater Channel Work

Photo

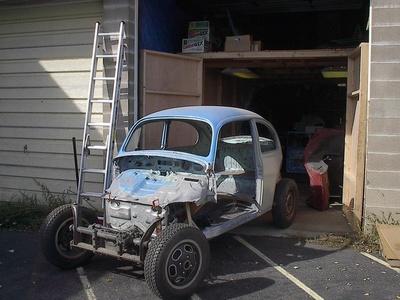
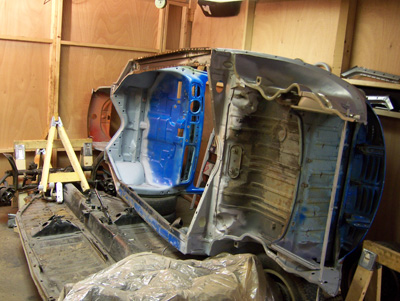
I've got the body rolled over on its side now, peeling off the bottom cover of the heater channels. Since I replaced the front section which didn't come with the bottom cover, I figured this was a good time to replace the entire length. I wanted to expose (hopefully) the last of the rust, and be done with it once and for all!


Photo

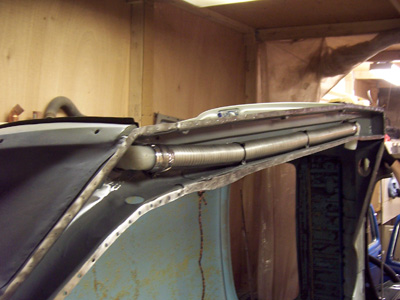
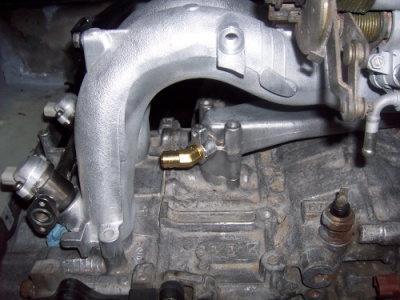
Another piece that I wanted to improve was the pipe that the hot air travels through up to the front. The originals were all rusted, and were not air tight. My solution was to buy some galvanized steal tubing from McMaster-Carr, and some 90 degree pipe fittings to plumb the hot air up to the front.


Photo

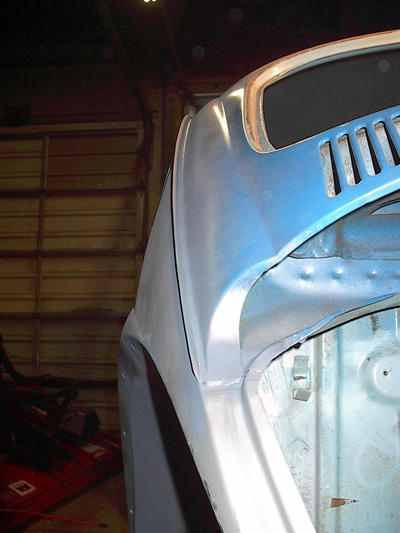
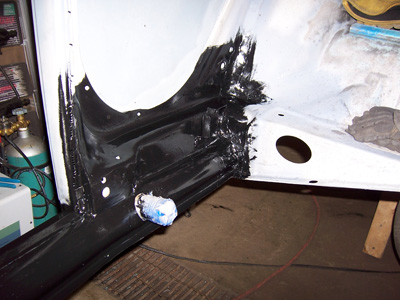
After sandblasting I painted the inside of the channels with Magnet Paint Chassis Saver. (Found at my local paint supply store) I really like how this stuff goes on, and drys to a nice smooth finish. I will be using this paint where ever I want to protect against future rust, rock chips, and general dirty shenanigans : )


Photo

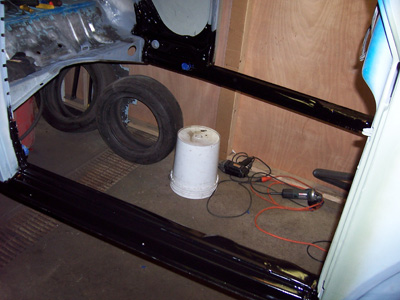
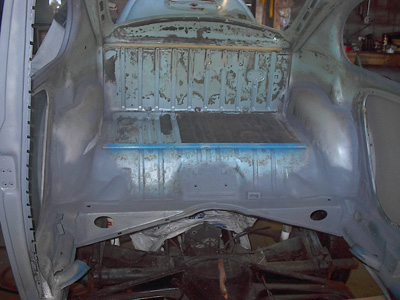
Here is everything painted up and finished. To get to this point, I drilled a zillion holes in the covers, sprayed weldable zink primer on the spots to be welded, welded all the holes up, ground down the welds, and painted on the rust paint.


Photo

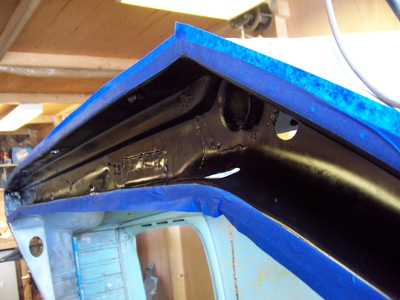
Here is the back section, you can see the 90 degree elbow sticking out. I ended up welding up the old hole that the heater channel was sticking out of, and cut a circular hole that the fitting would fit nicely in.

Labels: , ,

Sunday, December 16, 2007

20) Rollin' out into the sunlight

Photo

Its not very often that I roll the bug out, but it was a nice day! It's also good to inspect everything in the bright sunlight. You can see that I've cut away the lower left door hinge section, and it's all sand blasted. Next, it's time to weld that section in, and start getting this front end all wrapped up!

Labels: ,

Thursday, July 5, 2007

12) Current Progress

I'm busy retro posting, so this is progress, but a little while ago. How long ago, let's just say this project has been in the works for a few years : )

Keep tuned for more updates, and I promise I'll catch up to real time soon!


This is the current progress of the rear luggage compartment. I still have some tar to remove. It's pretty easy if you just hit the underside with some heat, then scrape it right off.

Labels:

Monday, June 4, 2007

8) Left rear quarter done!


I'm happy with how these quarter panels ended up. The part I worried most about was the top ridge running under the drip rail. It looks like that originally at the factory the top of the quarters were spot welded in before the roof was put on. I ended up drilling holes down through the drip rails. This way when the quarter was put in place, I could place a plug weld from the top. It ended up working really well! This picture was taken after I ground down the welds.

Labels:

Monday, May 28, 2007

3) Tearing it down!

Photo

I started by taking everything apart that I could get my hands on. I knew that eventually I'd be down to the bare shell and chassis. It starts with the big items (fenders, hoods, seats) and just keeps going and going, until I had small bags of bolts and pieces parts. The more I tore it down, the more awful rust I found! I knew this project was going to take some serious time to complete!

Labels: ,