Sunday, July 12, 2009

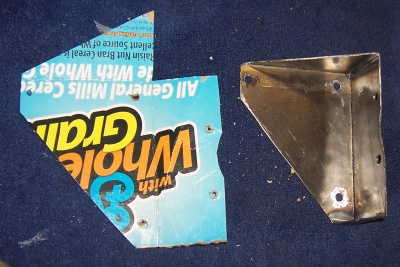
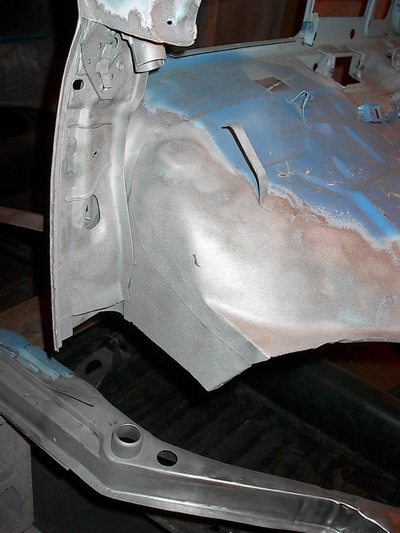
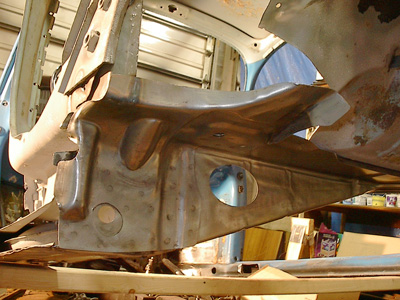
41) Alternator Bracket

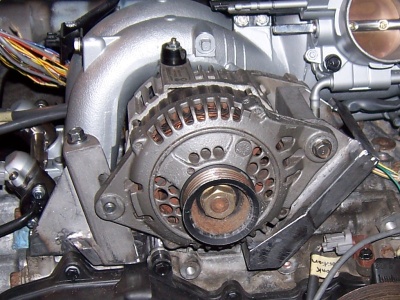
With the rotated coolant manifold the stock location of the alternator no longer works. Slowly, I built up a bracket that would bolt into the location of the old power steering pump. I mostly used 3/4" square tubing, with a few pieces of spare metal that I had laying around also. (There are some pieces of old bumper brackets and bed frame angle iron in there :)

Photo
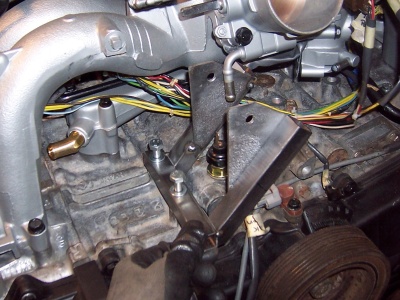
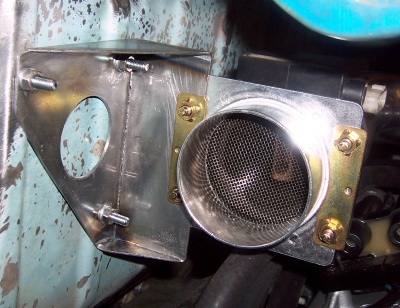
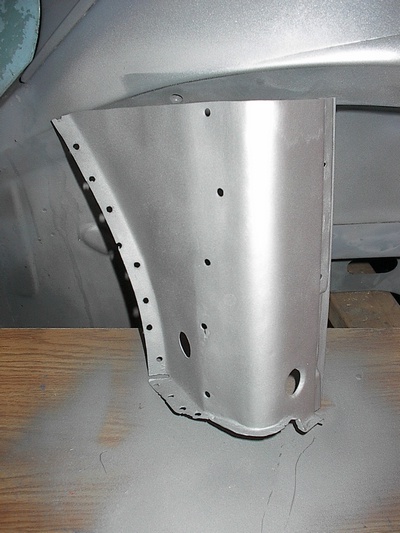
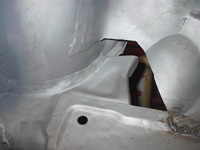
This is the pivot side of the alternator. I needed to make sure the oil pressure sensor and throttle body preheater hose would fit around the bracket.


Photo
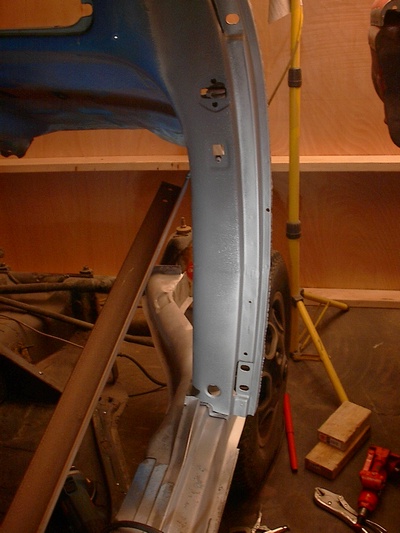
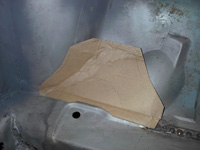
This is a mock up of the adjustable side of the alternator. The OEM bracket bolts from the other side, but I'm planning to bolt through in this direction because it is less fabricating and material needed.

Photo
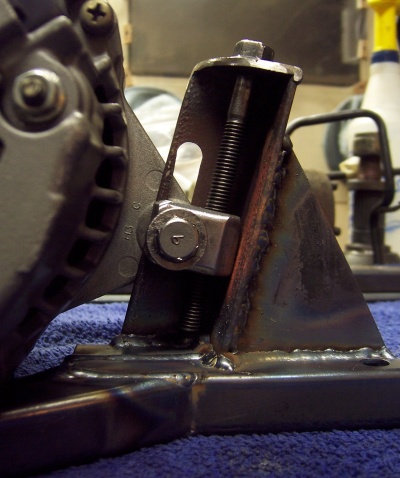
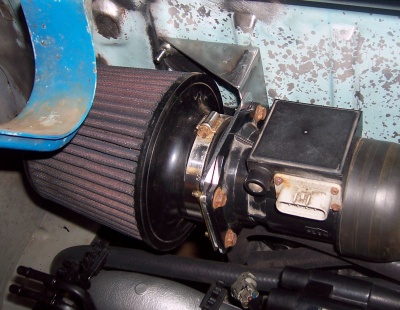
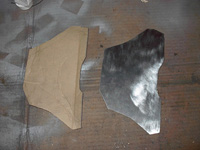
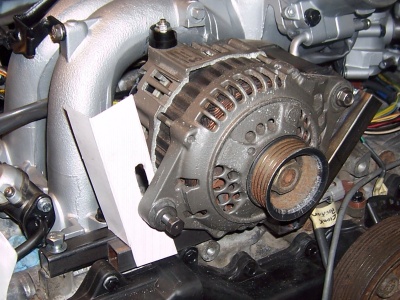
This is the front side of the adjuster. You can see here it adjusts like normal, just from the other side. I had to pay a lot of attention to the min and max adjustments of the alternator to be able to get the most travel possible. I ended up having to grind down the intake and alternator a bit to get even more travel.

Photo
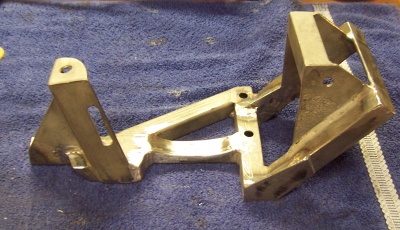
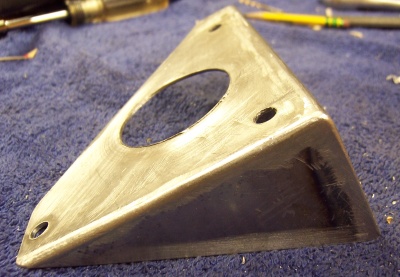
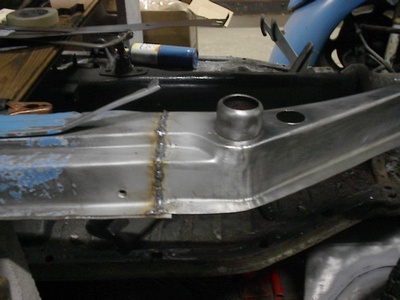
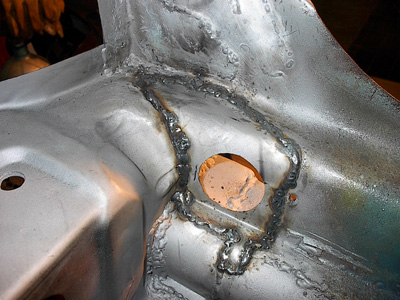
This is the roughly finished bracket (minus paint of course). I added some gusseting to make a little more rigid.

Photo
Finished and alternator mocked up. Next up will be to find a belt that fits!

Labels: ,

Thursday, April 30, 2009

40) Air filter bracket

Photo
Here's the template and the initial fabricated bracket that will hold the air filter to the firewall.

Photo
Here I've ground down the welds, and cut a super lightweight "Racing" hole :)

Photo
I'm welding in some studs to the firewall so this can bolt up easy. The attachment to the MAF tube is where it all connects up. I actually can't decide between welding in studs or nuts. Any recommendations?

Photo
Here's what it looks like all bolted up. The air filter and MAF will stay solid to the car and with the help of the bubble connection (not showing here) in the middle, the rest of it will move with the motor.

Labels: ,

Saturday, February 23, 2008

26) Last of the sandblasting (Maybe?)

Photo

OK I'm getting down to the last of the sandblasting on the main body shell! Can I say, I'm excited? It's a dirty job sandblasting, I have to get myself geared up to do it. I don't mind when it's in the blast cabinet, but out on the car, it just gets so dirty. I'll be finding sand for weeks in and around parts of my body I didn't even know existed.


Photo

Here is the underside after welding up a lot of seams and painting.


Photo

Here is the inside shot of the luggage area. Feels good to get this all under paint.

Labels:

Monday, January 28, 2008

25) Heater Channel Work

Photo

I've got the body rolled over on its side now, peeling off the bottom cover of the heater channels. Since I replaced the front section which didn't come with the bottom cover, I figured this was a good time to replace the entire length. I wanted to expose (hopefully) the last of the rust, and be done with it once and for all!


Photo

Another piece that I wanted to improve was the pipe that the hot air travels through up to the front. The originals were all rusted, and were not air tight. My solution was to buy some galvanized steal tubing from McMaster-Carr, and some 90 degree pipe fittings to plumb the hot air up to the front.


Photo

After sandblasting I painted the inside of the channels with Magnet Paint Chassis Saver. (Found at my local paint supply store) I really like how this stuff goes on, and drys to a nice smooth finish. I will be using this paint where ever I want to protect against future rust, rock chips, and general dirty shenanigans : )


Photo

Here is everything painted up and finished. To get to this point, I drilled a zillion holes in the covers, sprayed weldable zink primer on the spots to be welded, welded all the holes up, ground down the welds, and painted on the rust paint.


Photo

Here is the back section, you can see the 90 degree elbow sticking out. I ended up welding up the old hole that the heater channel was sticking out of, and cut a circular hole that the fitting would fit nicely in.

Labels: , ,

Monday, January 21, 2008

24) Front apron grill

So after thinking (read: worrying) about air flow the other day, I finally bit the bullet and decided to add some venting to the front apron. This was hard for me because I really wanted ALL of the body work on this car to be stock, and this would change the attitude of the car a little. But I want to be functional above all, and I really don't want to be caught 100's of miles away and have this thing over heat :)

I finally came up with the idea of using a grill just like a super beetle. The problem with the super beetle is the grill up front is very rounded, and it just wouldn't work in this virtually flat apron. Then it hit me, I have a spare hood, and it's got the fresh air vents up top! Sure enough, I cut it out and it fits perfectly! I really like how this is going to look, because it will match the one of the hood!


Photo

Here are the first few welds. I'm being super careful here about heat and burn through. I don't want to alter these perfect vents. I couldn't only imagine how hard it would be to fix them.


Photo

A few more welds, slowly...


Photo

The finished product. I'm in love!

Labels: , ,

23) Radiator bracing

Photo

Here is the initial planning for the radiator bracing. The round bars that are crossed are just there for bracing the front end temporarily (to keep it straight). I will leave out the sheet metal that is normally behind and below the spare tire. I'm framing the area with square 3/4" tubing. I will triangulate the corners for strength and keep this whole front end square. My plan is to make this area generic enough that I can use many different radiators (if needed) I will (hopefully) just have to make new radiator mounting brackets that will bolt to these cross bars.


Photo

Here is my new radiator (its aluminum made by Mishimoto for a Honda Civic) The copper 90' fitting is there representing the shape of coolant hose I'll have to find. You can see here the cross bar in front and the cross bar below that I will build the brackets onto. I plan to close this top section all in with either aluminum or fiberglass. Air flow will come from the entire open floor, plus vents that I will weld into the front apron. Coming next!


Photo

Here is the detail of strengthening the corners. I'm integrating the original gas tank support into the bracing.

Labels: ,

21) Further progress on the front end

Photo

This section has been sand blasted and primed with weldable primer. Just about ready to weld in the quarter panel.


Photo

The final mock up of the two quarter panels and the front clip. Everything is lining up pretty good. I will attempt to keep everything as straight as I can as I start to tack everything in.


Photo

The start of the spot welds! I drilled holes into the quarter panel, and welded each one up. It was important to weld each time in a completely different area so the heat would not build up and warp the panel. The edge were the drip rail and panel come together (In front of the door) will be a tricky area to perfect. I have to bend the outside edge around to the front. I will carefully grind the welds down first.


Photo

Here I've tacked on the weather strip holding piece. This metal is a bit thinner then the rest of the car, so I had to go quickly to not burn through. My first side I had drilled holes through the strip, and welded them up, but I found that this was too aggressive. The other side I ended up just welding spots directly beside the strip, and moving in on the strip. This gave a much cleaner weld, and actually burned through much less. After welding, I went through and ground down the top and bottom of each weld.


Photo

Here is the right side after grinding the welds down, bending the edge over, and hammer / dollying the crap out of it for a while. Turned out pretty good. Any section that was bulging out a bit, I hit with a flat file. Later when I'm doing paint prep, I may revisit this area and make sure this line is very smooth and straight. Maybe a little bondo (and paint, make it what it aint! :)

Labels: ,

Sunday, December 16, 2007

20) Rollin' out into the sunlight

Photo

Its not very often that I roll the bug out, but it was a nice day! It's also good to inspect everything in the bright sunlight. You can see that I've cut away the lower left door hinge section, and it's all sand blasted. Next, it's time to weld that section in, and start getting this front end all wrapped up!

Labels: ,

Saturday, December 8, 2007

19) New kick panel mocked up

Photo

Here's the new kick panel mocked up into place. I set the body down to check the alignment of the kick panel and the floor pan.

Labels: ,

17) Right lower door hinge pillar

Photo

Here is a piece pulled from a southern car (Thank you www.thesamba.com). I carefully extracted the metal needed to just replace the lower pillar (including the hinge mount. This is after sandblasting and trimming. I lined it up to the car, marked the line on the car, and cut. Using a file on both parts, I was able to get it to line up just right.

Photo

After welding and grinding, and a coat of primer. I'm not welding the lower section to the heater channel just yet because I want to be able to line up the doors before I tack them down.

Labels: ,

Thursday, October 11, 2007

15) More work on right front

Photo

Here I've welded in the new front section of the right heater channel. The quality and fit were good. I made sure the fit was correct by clamping in the firewall and the underside of the heater channel. In a perfect world I would have just replaced the entire channel, but I have to draw the line somewhere! : )

Photo

After cutting away any rot and rust holes, I sandblasted the entire area! I love the look of fresh clean metal! You can also see the finished heater channel after I ground down the welds. All of these sections are ready to be painted with zink weld though primer. I really don't want any metal exposed. It's my life mission at this point.

Labels: ,

Thursday, July 5, 2007

11) More detail on another patch

Here's a little more detail on another patch I made. You can see the holes I drill all around that I used to plug weld in. For a nicer looking outcome, welding around the perimeter and then grinding smooth works well. For a perfect fit, cut the metal so that it is flush with the hole. Later I'll post some pics of flush welding.


And here is the final outcome. Eventually I will seal all the exposed seams with a seam sealer.

Labels:

Monday, June 4, 2007

9) Right rear quarter panel


Here's the worst of the right rear quarter panel! Looks bad, but really after I cut out all the rot and sandblast everything, it turns out pretty good!


This shot was taken was I was about ready to start welding the quarter panel on. I try and make sure that every boxed in section, is painted with zink weld through paint. I'll make sure everything is sealed up tightly also so that the boxed in areas are protected from the elements.

Labels: ,

7) Left rear crossmember


One of the most rotted sections of my beetle was under the rear seat just above the crossmember (The part with the oval hole). My strategy here was to just make straight cuts far enough away from the rot so that I could make patch panels. I also found replacement crossmembers.


Here is the new crossmember in place. I made sure to remove any primer and all of the surrounding paint on the car.


After welding in the crossmember, I had to make some patches. This section is where the main wiring harness goes through. I hope I can find a good rubber grommet that will fit! After welding these in, I try and grind down the weld beads as best as I can.

Labels: , ,